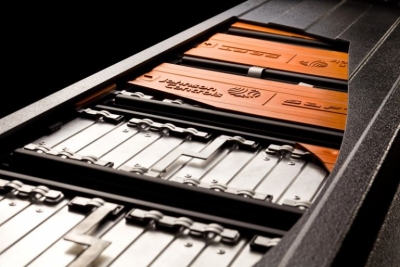
Most of the recreational vehicles or sports vehicles are equipped with lead-acid batteries, also called deep cycle batteries. These batteries are so designed that they retain the charge for a long time even without any external source of power.
However, as this type of battery utilizes lead -acid in liquid form as an internal source of electricity, it can lose the charge very fast, if not maintained well. Fortunately, there is no need to purchase a new battery for your homemade electric car if the performance of the original battery begins to deteriorate.
The original deep cycle battery can be easily reconditioned. Reconditioning of deep cycle battery is comparatively a simple job and one can take up even as a do-it-yourself (DIY) venture. However, an external battery charger is required to recondition a deep cycle battery.
In addition, certain tools and consumables, like vise grips or a crescent wrench, steel wool, a funnel, a bucket and a pair of rubber gloves are also needed. Besides these items, baking soda, distilled water and Epsom salts should also be readily available for the job.
Steps For Reconditioning Old Deep Cycle Battery
To start with, make sure that acid is not leaking from the battery. The surface of the battery should not be touched with bare hands even if there is a little leakage, instead use a pair of gloves.
The next step is to disconnect the battery by removing positive and negative cables and after that take out the battery from the case. Clean both the housing of the battery and each one of the terminals with a paste prepared from baking soda and water. Steel wool will be useful for applying paste to the battery.
Afterwards, take out the plastic plugs normally located at the top of a battery and draw off the contents of the battery cells into the bucket. If the batteries are sealed, the caps cannot be removed and in that case, try to find out if there are any soft hollow portions along the top of the battery.
Sealed batteries are generally opened and drained out by drilling holes in each of theses hollow portions, using a1/4 inch drill bit. As the battery cells are being drained, mix quarter of a gallon of distilled water and eight ounces of Epsom salts and then blend the mixture well till the Epsom salts are fully dissolved. As a next step, fill all the cells of the battery with the mixture using a funnel.
After filling, replace the caps or seal the battery once again and make it ready for re-installation. In case the battery was sealed and holes had to be drilled, then, the drilled holes can be sealed with rubber plugs, which can be easily procured from any stores dealing in automobile parts.
After the battery is sealed, hook it to a regular multiphase battery charger. Sufficient time should be allowed to charge a deep cycle battery and “Quick Start” option should never be used to charge the battery quickly. It usually takes about an hour or more to fully charge a deep cycle battery.
After the battery is completely charged, reconnect the cables and then reinstall it on your DIY electric car. In order to test the battery after reconditioning and ensure that it is working, drive around for a few minutes. It is very essential to check the battery after every drive, initially, for a few days after reconditioning.
The process of charging the battery should be repeated till the mixture of salt and water facilitates retention of charge for a longer period. As a safety precaution, reconditioning of deep cycle battery should not be undertaken in a limited space and protective eye-shades should be put on while working with uncovered cells.
Deep Cycle Battery Reconditioning Guide

Are you looking for a step by step guide on how to recondition an old deep cycle battery? If you are, check out the Electric Golf Cart Battery guide. The ebook will teach you how to revive dead golf cart batteries which are particularly deep cycle. The ebook cost only $19.95. Click on the link below to visit the web site now!
